How to Lube Mechanical Keyboard Switches: Complete Guide
By MechKeyReview Team • • complete mechanical keyboards guide
Lubing switches is the single highest-impact modification you can make to a mechanical keyboard. A scratchy, rattly stock switch can become genuinely smooth and quiet in about two minutes of work per switch — the kind of difference that's immediately obvious to anyone who types on it.
The process is not complicated, but the details matter. Use the wrong lube on a tactile switch and you'll destroy the bump. Lube a clicky switch and you'll silence it permanently. Apply too much and keys feel mushy. This guide walks through every decision — tools, lube selection, step-by-step technique, and the mistakes that trip up most beginners.
Whether you're lubing 70 switches for a full build or just freshening up an existing keyboard, you'll find everything you need here.
Watch first: complete overview
Why Lube Switches?
Mechanical switches are mechanical. Two pieces of hard plastic — the stem and the housing — slide against each other thousands of times per day. Out of the factory, that plastic-on-plastic contact produces friction, a scratchy sound on every keystroke, and over time, inconsistent feel as different parts of the switch wear unevenly.
Lube eliminates that friction. A thin, even coat on the contact surfaces turns a scratchy switch into one that feels like it's moving through air. Linears become genuinely smooth. Tactiles develop a cleaner, more defined bump. Silent switches get even quieter. The sound profile shifts from high-pitched plastic scratch to a deeper, more resonant thock — the sound most enthusiasts are chasing.
It's also cheap. A 10ml syringe of Krytox 205g0 costs around $20 and lubes hundreds of switches. That's a fraction of what you'd pay for a "pre-lubed" keyboard from a brand — and their factory lube is almost always inconsistent anyway.
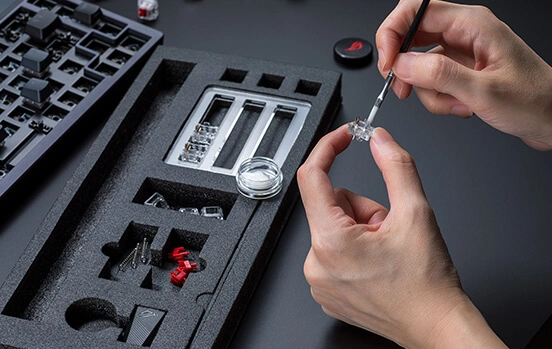
What You Need: Tools & Materials
You don't need much. The core kit is four items, plus the lube itself. The optional items save time on large batches.
| Tool | Cost | Notes |
|---|---|---|
| Switch Opener | $5–15 | Opens the switch housing without damaging the clips. Costs $5–15. A flat-head screwdriver works in a pinch but risks scratching the housing. Get a dedicated opener — it pays for itself in the first batch. |
| Thin Paint Brush | $3–8 | Size 00 or 000 (synthetic bristle). This is what you apply the lube with. Too large a brush means too much lube per stroke; too small and you'll be there all day. A $3 art brush from a craft store is exactly what you need. |
| Lube Station / Switch Holder | $10–15 | Holds 90–100 switches upside-down so you can work systematically. Not strictly necessary, but a huge quality-of-life improvement when lubing a full keyboard. Around $10–15. |
| Stem Holder or Tweezers | $5–10 | You need something to hold the stem while you apply lube to all four sides. Dedicated stem holders keep the stem stable and prevent you from accidentally touching the freshly-lubed surface. Regular tweezers work too. |
| The Lube | $15–25 | See the section below. The lube choice depends entirely on your switch type — using the wrong one is the most common beginner mistake. |
| Optional |
Switch puller — to remove switches from a hot-swap keyboard without bending pins. Small container or ziplock bag — for bag-lubing springs (faster than hand-lubing each one). Paper towels — for cleaning up excess lube and wiping your brush between applications. |
Which Lube to Use (and Which to Avoid)
This is the decision that most beginners get wrong. There is no universal "best" lube — the right choice depends on your switch type, and using the wrong viscosity ruins the switch feel.
| Lube | Type | Best for | Notes |
|---|---|---|---|
| Krytox 205g0 | Thick grease | Linear switches | The gold standard for linears. Creamy, even coverage. Too thick for tactiles — kills the bump completely. |
| Tribosys 3203 | Thin grease | Tactile switches | Light enough to preserve tactile feedback. Apply only to housing and stem sides, never the legs. |
| Tribosys 3204 | Medium grease | Linears, light tactiles | Sits between 3203 and 205g0. Good all-rounder if you want one lube for everything except clicky switches. |
| Krytox GPL 105 | Thin oil | Springs only | Very thin — not for housing or stem surfaces. Used for bag-lubing springs to eliminate spring ping. |
On a budget? Superlube 21010 ($8) is a decent substitute for 205g0 on linears. Not as refined, but functional. Avoid generic hardware-store greases, WD-40, cooking oil, or anything not specifically formulated for close-tolerance plastic parts.
Tips and tricks from an experienced builder
Step-by-Step: How to Lube Switches
The process is the same for linear and tactile switches. The only difference is which surfaces you lube on tactile switches (you skip the stem legs).
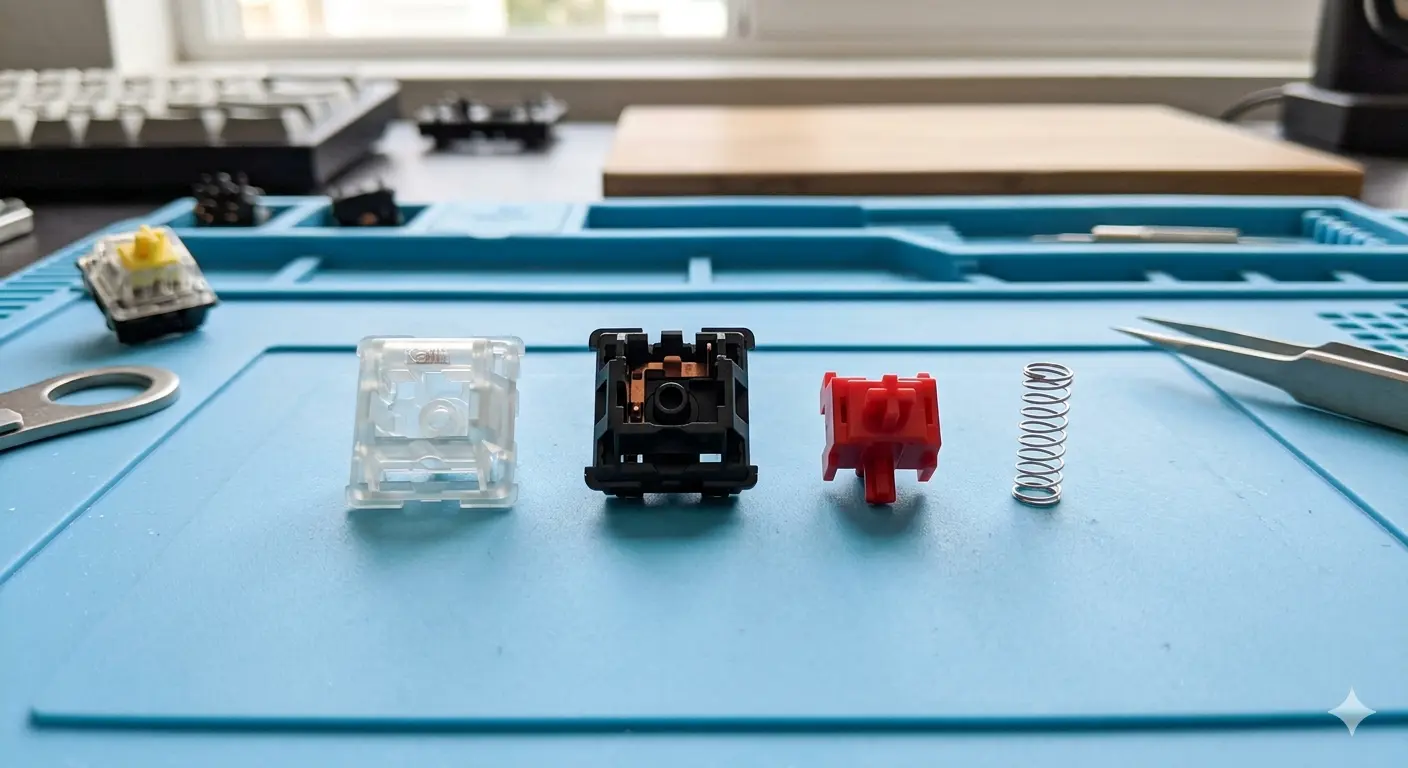
The 4 switch components laid out — top housing, bottom housing, stem, spring
| 01 |
Step 1: Open the switch
Place the switch in the opener and press down firmly. The clips on the top housing will release cleanly. If it feels like it's about to crack, you're pressing at the wrong angle — there are two clips on the long sides of the switch, not the short sides. Separate the top housing and set it aside. Remove the stem and spring. You now have four components: top housing, bottom housing, stem, spring. |
| 02 |
Step 2: Lube the bottom housing
This is the most impactful step. The bottom housing has two rails — the channels where the stem legs slide. Apply a thin, even coat of lube to both rails using light brush strokes in one direction. Also lube the inside walls of the housing (where the stem body makes contact). Do not fill the housing with lube. You want a thin film, not a pool. Less is more. |
| 03 |
Step 3: Lube the stem
Hold the stem with your stem holder or tweezers. Apply lube to all four sides of the stem's cylinder — this is the main body of the stem that slides through the housing. Use single, directional brush strokes. For linear switches: also lube the two legs (the bottom part of the stem that contacts the spring mechanism). For tactile switches: skip the legs. Lubing the legs of a tactile switch eliminates the tactile bump. |
| 04 |
Step 4: Lube the top housing (optional)
The top housing has a cylindrical cavity that the stem passes through. A very light application of lube here reduces stem wobble and gives a slightly smoother feel. This step has the smallest impact of all — skip it if you're short on time. |
| 05 |
Step 5: Lube and reassemble
Lube the spring (see the spring section below). Drop the spring into the bottom housing, then place the stem on top — make sure the stem is facing the right direction (the longer bump side goes toward the front of the switch). Snap the top housing back on. You should hear a clean click when both clips engage. That's it. One switch done. |
Linear, Tactile and Clicky: What Changes
The technique above applies to all switch types, with one critical exception per type.
How to lube every switch type — full walkthrough
How to Lube Switch Springs
Springs are the source of a specific, annoying sound: spring ping. It's a metallic resonance you hear on each keystroke, especially on heavier switches. Lubing springs eliminates it entirely. The lube to use is Krytox GPL 105 — a very thin oil. Do not use grease on springs.
| Bag lube (recommended for full keyboards) | Put all your springs into a small ziplock bag or airtight container. Add a very small amount of Krytox 105 — start with one drop per 20 springs. Seal the bag and shake vigorously for 30–60 seconds. Open and shake out the springs. They should have a very thin, even film of oil. This method is fast and produces consistent results across a large batch. |
| Hand lube (slower, more precise) | Apply a tiny drop of 105 to the end of each spring. Pinch the spring between your thumb and index finger and twist to spread the oil along the coil. This takes about 5–10 seconds per spring — fine for 10 switches, tedious for 70. |
Lubing Without Desoldering
If your keyboard has hot-swap sockets, pull the switches out with a switch puller, lube them on your desk, and push them back in. Clean and simple.
If the switches are soldered in, you have two options. The first is to desolder them — a soldering iron and some desoldering braid or a pump gets each switch out in 30–60 seconds with practice. The second is partial lubing: remove the keycaps, use a switch opener to crack the top housing while the switch is still in the board, and apply lube with a fine brush to the accessible surfaces. You won't be able to lube the bottom housing rails (the most impactful surface), so results are limited.
If you're serious about the mod, the desoldering route is worth it. If that feels like too much, the board-lubing trick still helps with spring ping and some of the housing scratch.
Two methods for lubing without desoldering
Common Mistakes to Avoid
| # | Mistake | What happens / Fix |
|---|---|---|
| 01 | Over-lubing | The most frequent mistake. Too much lube makes switches feel mushy, inconsistent, and slow. If you can see the lube pooling in the housing or globbing on the stem, you've used too much. Wipe it down and start again. A thin film is all you need. |
| 02 | Lubing tactile switch legs | If you lube the legs of a tactile switch, the tactile bump disappears. The fix is to clean the switch with isopropyl alcohol and re-lube correctly. But it's easier to just not lube the legs in the first place. |
| 03 | Lubing clicky switches | As covered above — the click mechanism requires friction to work. Lube kills it. There is no way to restore a clicky switch after it's been lubed improperly without fully disassembling and cleaning with IPA. |
| 04 | Using the wrong lube | WD-40 evaporates quickly and leaves a residue. Cooking oil turns rancid inside the switch. Generic hardware grease is too thick and will attract dust. Stick to purpose-made keyboard lubes. The difference in cost is $15–20 and the difference in result is dramatic. |
| 05 | Skipping the rails | Some beginners lube only the stem and wonder why the switch still feels scratchy. The bottom housing rails — where the stem legs slide — are the highest-friction contact surface in the switch. If you only lube one thing, make it the rails. |
| 06 | Inconsistent brush strokes | Applying lube in random directions leaves uneven coverage and an inconsistent feel. Always brush in a single direction — one or two strokes per surface is enough. Think of it like painting a very small, very precise wall. |
Frequently Asked Questions
New to mechanical keyboards? Start with our complete mechanical keyboards guide.
Not sure which keyboard to buy? Read our step-by-step buying guide.
See our top keyboard picks