How to Clean a Mechanical Keyboard: The Complete Guide
By MechKeyReview Team • • Blog
Keyboards are one of the dirtiest objects in any workspace. Studies have found them harboring more bacteria than a toilet seat — and that's before you account for the crumbs, skin cells, and dust that accumulate between the keys over months of daily use. A dirty keyboard doesn't just look bad; it can cause keys to stick, switches to feel scratchy, and stabilizers to rattle.
The good news: cleaning a mechanical keyboard is easier than most people expect. A quick surface clean takes 15 minutes. A full deep clean — keycap soak, switch cleaning, case wipe-down — takes about 90 minutes and produces results that feel and sound like a new keyboard.
This guide covers both, plus the mistakes that damage keyboards or void warranties.
How Often Should You Clean Your Keyboard?
The answer depends on your environment and habits. A good baseline: a light clean every 2–4 weeks, and a full deep clean every 3–6 months. If you eat at your desk, have pets, or work in a dusty environment, cut those intervals in half.
| Frequency | Type of Clean | Time Needed |
|---|---|---|
| Every 2–4 weeks | Surface clean — compressed air + brush between keys | 10–15 min |
| Every 3–6 months | Deep clean — remove keycaps, soak, clean PCB | 60–90 min |
| When needed | Single switch cleaning — sticky or non-registering key | 5–10 min |
What You Need
You probably have most of this already.
| For a surface clean | Compressed air can (or hand-pump blower) · Soft brush (paintbrush or dedicated keyboard brush) · Microfiber cloth |
| For a deep clean (add to the above) | Keycap puller (wire puller preferred over plastic) · Large bowl or container · Dish soap · Small brush (toothbrush works) · Isopropyl alcohol (70–90%) · Cotton swabs · Clean towel |
Quick Surface Clean (15 Minutes)
Do this regularly to prevent buildup. You don't need to remove any keycaps.
| 01 | Unplug the keyboard Always disconnect before cleaning. For wireless boards, turn them off. |
| 02 | Blow out the debris Hold the keyboard at a 45–75° angle and use short bursts of compressed air between the keys, working in rows. The angle lets gravity help pull debris out rather than pushing it further in. Do this over a trash bin. |
| 03 | Brush remaining particles Use a soft brush to sweep debris from between and around keys toward the edge of the keyboard. Follow up with another pass of compressed air. |
| 04 | Wipe the keycap surfaces Dampen a microfiber cloth with water or a small amount of isopropyl alcohol. Wipe across the keycap tops to remove fingerprints and surface oils. Do not let liquid drip between keys. |
Full Deep Clean (60–90 Minutes)
Do this when the keyboard needs a real reset — after a spill, when keys feel sticky, or every 3–6 months as maintenance.
Keycap removal process
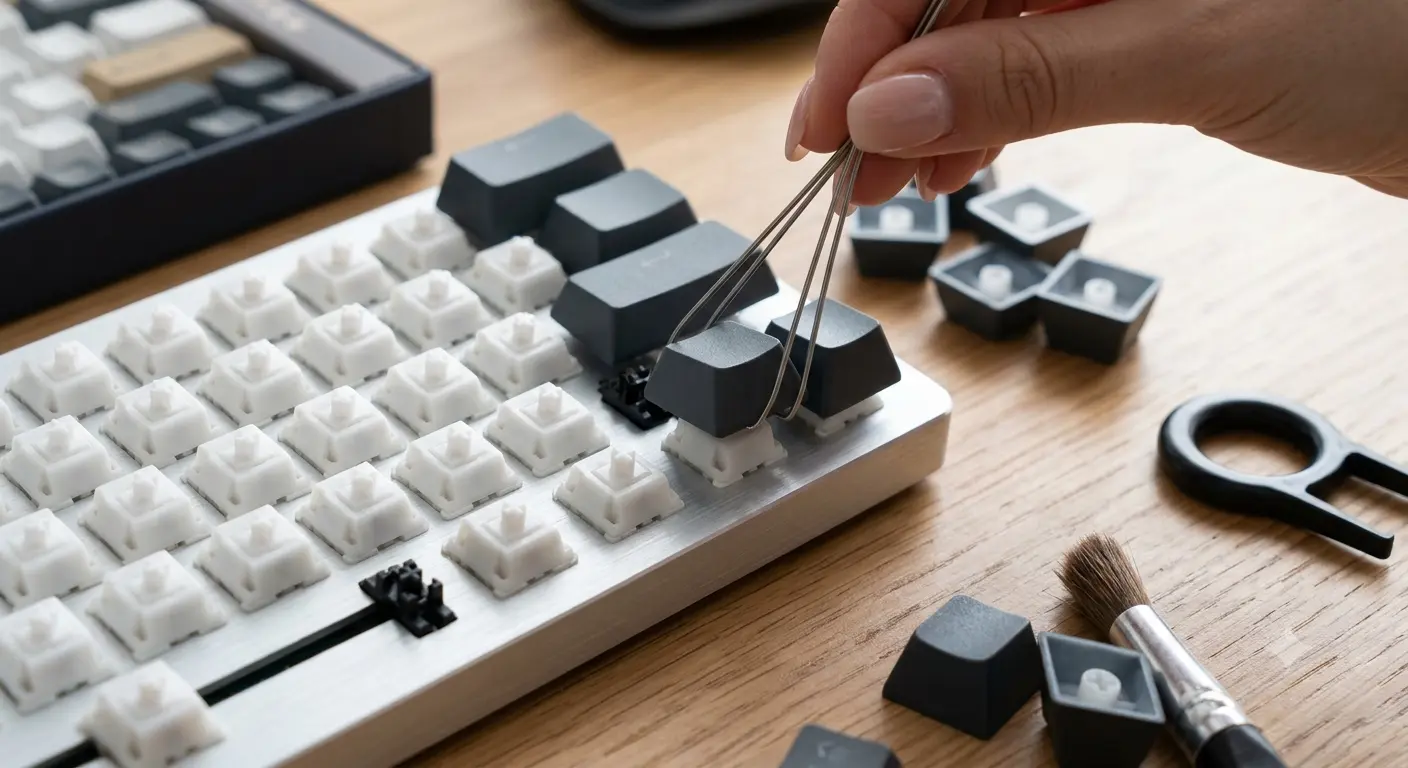
| 01 | Remove all keycaps Use a wire keycap puller for best results — it distributes force evenly and won't scratch the caps. Work row by row and keep the keycaps together (a tray or divided container helps). Larger keys (spacebar, shift, enter) may have stabilizer wires — pull them straight up slowly. |
| 02 | Soak the keycaps Fill a bowl with warm (not hot) water and a few drops of dish soap. Add all the keycaps and let them soak for 30–60 minutes. The soap breaks down skin oils and stubborn grime. Gently scrub any dirty caps with a soft toothbrush, then rinse thoroughly under clean water. |
| 03 | Dry the keycaps completely Spread them on a clean towel and let them air-dry for at least 6 hours — ideally overnight. Do not use a hair dryer: heat can warp ABS keycaps permanently. Do not reassemble until every cap is completely dry. |
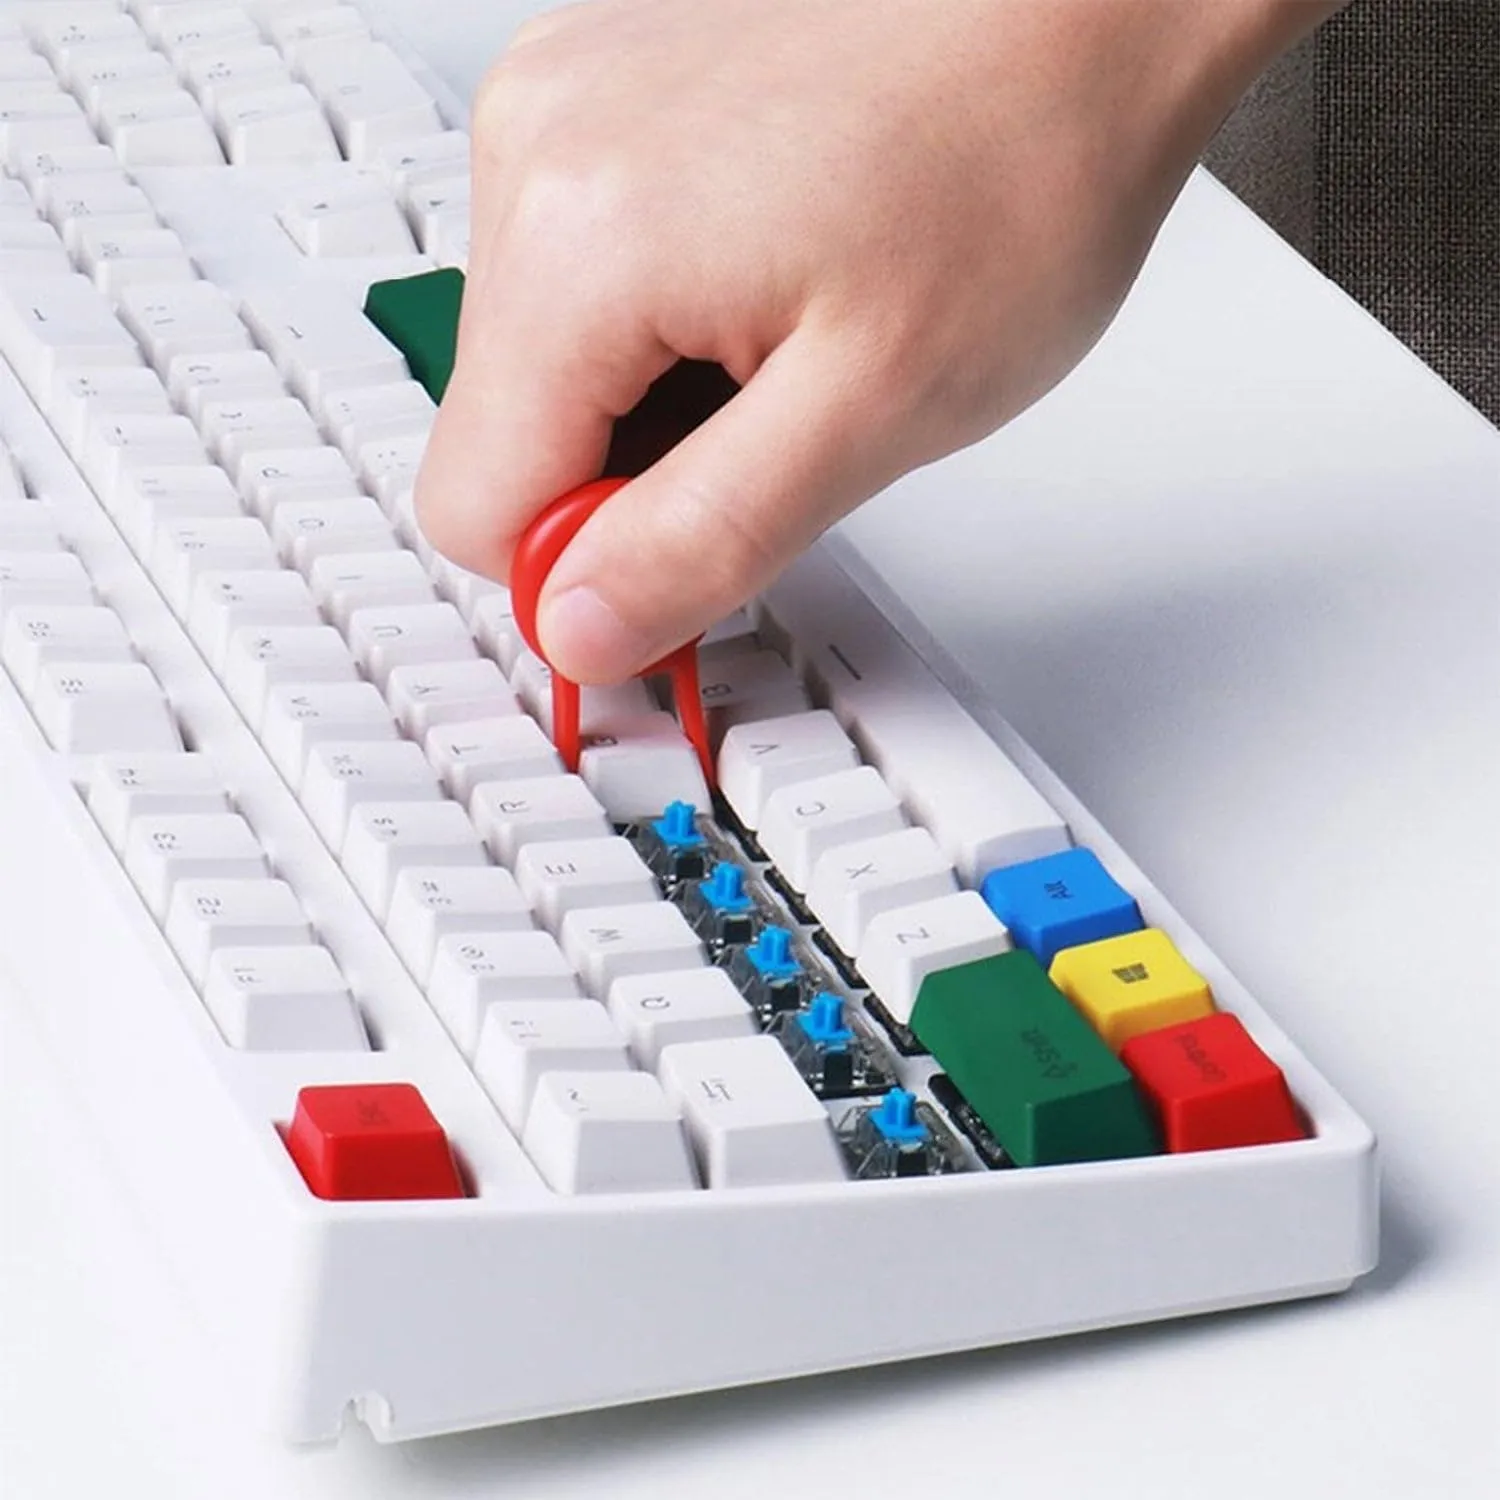
| 04 | Clean the keyboard body With keycaps removed, you now have full access. Use compressed air to blow out all debris from the switch stems and between rows. Dip a cotton swab in isopropyl alcohol and clean around each switch, the stabilizer housings, and the case surface. IPA evaporates quickly and is safe for PCBs — but never let it pool or drip in large amounts. |
| 05 | Clean the case and plate Wipe the outer case with a microfiber cloth dampened with IPA. For aluminum cases, this also removes fingerprints and oxidation marks. Avoid abrasive materials that scratch anodized surfaces. |
| 06 | Reinstall keycaps Once everything is completely dry, press each keycap back onto its switch stem. Align larger keys (spacebar, shift) with their stabilizer wires before pressing down. You'll feel and hear a satisfying click when each cap seats correctly. |
What to Do After a Liquid Spill
Act immediately. Unplug the keyboard within the first few seconds — liquid on a live circuit causes shorts. Turn it upside down to drain as much liquid as possible.
If it was water: let it dry completely for 48–72 hours before plugging back in. Elevate it at an angle to help drainage. If it was a sugary drink (coffee, juice, soda): you need to act more aggressively — sugar residue becomes sticky and corrosive as it dries. Remove keycaps, rinse the PCB with distilled water (do not use tap water), and dry thoroughly. For serious spills, IPA flushes help remove residue.
Do not apply heat to speed drying. Patience is the correct approach.
What Not to Do
| # | Don't | Why / Alternative |
|---|---|---|
| 01 | Don't put keycaps in the dishwasher | Hot water and strong detergents warp ABS keycaps and fade legends. Warm water + dish soap in a bowl is the correct method. |
| 02 | Don't use WD-40 on switches | WD-40 is a solvent and a very light lubricant. It evaporates quickly, leaves residue, and will damage switch plastics over time. Use proper switch lubricants (Krytox 205g0, Tribosys 3203). |
| 03 | Don't spray cleaning products directly on the keyboard | Always apply liquid to a cloth first, then wipe. Spraying directly risks liquid getting into switches and the PCB. |
| 04 | Don't vacuum with a household vacuum | Strong suction can pull off keycaps and damage switch stems. A keyboard-specific blower or compressed air is safer. |
| 05 | Don't clean while plugged in | Even small amounts of moisture near a live USB connection can cause shorts. |
Frequently Asked Questions
While you're at it — lubricate your switches → Full guide: how to lube switches
New to mechanical keyboards? → Read our complete beginner's guide
Best Mechanical Keyboards 2026