How to Build a Custom Mechanical Keyboard: Complete Guide
By MechKeyReview Team •

Building a custom mechanical keyboard isn't as complicated as it sounds. The community has developed a fairly standardized process over the years, and entry-level custom builds now start at $80–120 and can be assembled in 2–4 hours without soldering. The result: a keyboard tuned exactly to your preferences that no pre-built can replicate.
The main benefit over buying a pre-built keyboard isn't the cost savings (custom builds usually cost more for the same spec level). It's control: control over sound profile, switch feel, layout, and every other variable in the typing experience. You understand every choice because you made it.
This guide walks through the complete process: the parts you need, how to choose them, stabilizer and switch preparation, and the assembly order. We'll cover hot-swap builds (no soldering required) for beginners.
Complete Parts List
A custom keyboard requires these eight components. You need all of them — there are no shortcuts:
| Part | What it does | Typical cost | Key notes |
|---|---|---|---|
| Case | The outer shell. Defines layout, sound profile, and aesthetics. | €20–300+ | Plastic = lighter, quieter. Aluminum = heavier, more resonant. Affects sound significantly. |
| PCB | The circuit board switches mount to. Registers keypresses. | €25–80 | Choose hot-swap PCB for beginners. Must match case layout and size. |
| Plate | Sits between PCB and switches. Holds switches in place, affects flex. | €10–40 | Material: PC = flexible/quiet; aluminum = stiff/clacky; FR4 = medium. Some builds are plateless. |
| Stabilizers | Support large keys (spacebar, Enter, Shift, Backspace) to prevent wobble. | €10–35 | Screw-in stabs are preferred over clip-in. Prep before installing. Critical for sound quality. |
| Foam/dampening | Optional layers inside the case to reduce hollow sound. | €5–20 | Case foam, PCB foam, and switch foam all reduce echo and rattle. Optional but recommended. |
| Switches | The mechanical mechanism under each key. Defines typing feel. | €20–80 | Linear, tactile, or clicky. Lube before installing for best results. |
| Keycaps | The plastic covers that sit on top of switches. What you touch. | €15–200+ | Must match your keyboard's layout. PBT > ABS for durability and texture. |
| USB cable | Connects keyboard to PC. | €5–40 | Basic works fine. Coiled cables are the community aesthetic preference. |
Step 1: Plan Before You Buy
The most common beginner mistake is buying parts impulsively and then discovering incompatibility issues. Take 30 minutes to answer these questions before spending anything:
Step 2: Prepare Stabilizers (Don't Skip This)
Stabilizer preparation is the most impactful step most beginners skip — and the reason so many entry-level keyboards sound rattly on spacebar, Shift, and Enter. The factory lubricant on most stabs is insufficient. You need to clean and relube them before installing.
The standard prep process: (1) Disassemble stabs completely. (2) Clean with isopropyl alcohol. (3) Apply dielectric grease (Krytox 205g0 or Permatex) to wire ends and housing contact points. (4) Optionally band-aid mod the PCB mounting points. Well-prepped stabs transform large key sound from "rattle" to "thock." Our full guide covers this in detail.
Step 3: Prepare Switches (Optional but Recommended)
Factory switches ship with minimal lubrication. Applying lubricant (Krytox 205g0 for linears, 105 oil for springs, lighter coat for tactiles) dramatically improves smoothness and sound. A full switch lube job takes 2–4 hours for a full-size keyboard but makes the most noticeable improvement to typing feel.
For your first build, it's acceptable to install switches dry and lube later if you're impatient to complete the build. Hot-swap PCBs allow you to pull switches for lubing after the fact.
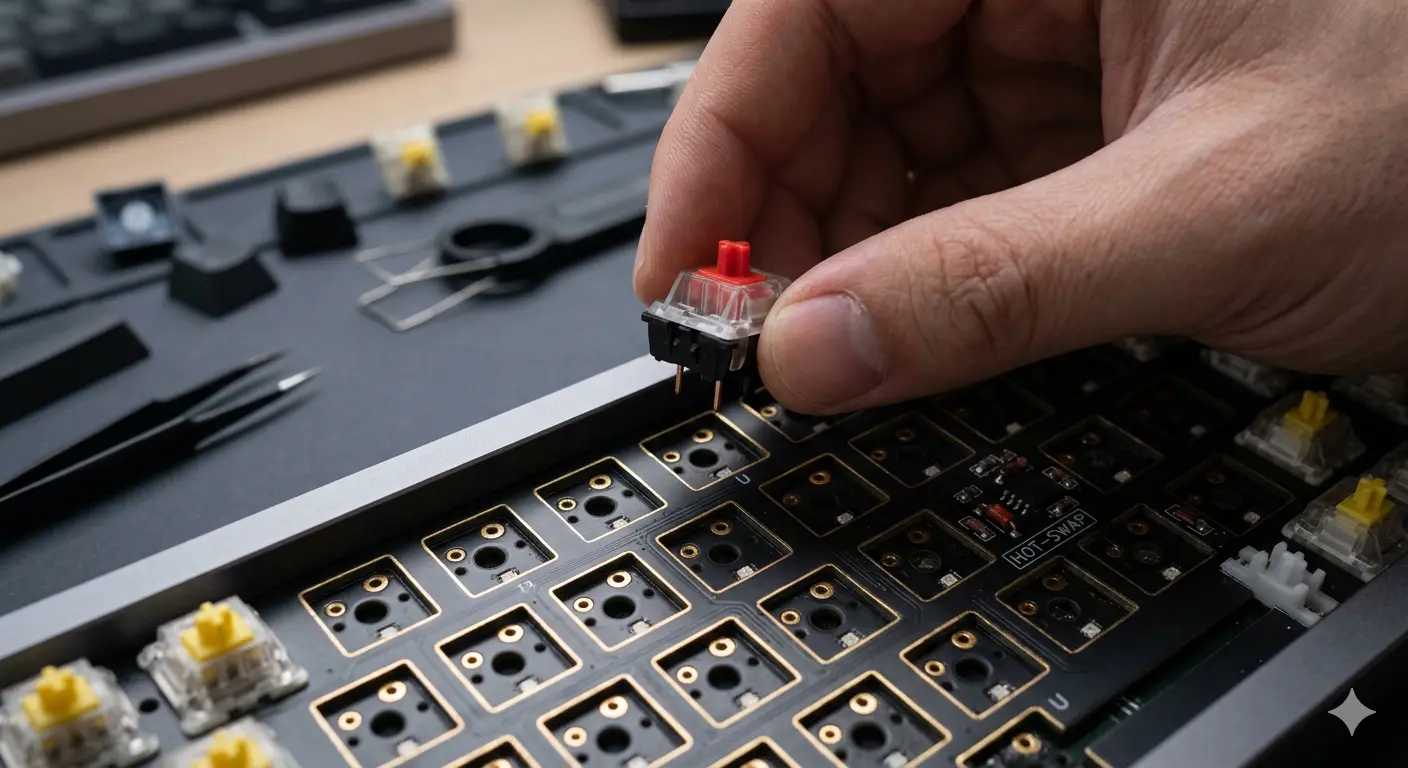
Installing switches into a hot-swap PCB — no soldering required. Make sure pins are straight before pressing switches in.
Step 4: Assembly Order
Assembly order matters. Following this sequence prevents rework:
Budget Tiers for a Custom Build
Here's what you get at each price range:
Not sure which switches to use? Our complete keyboard switches guide covers every option. Before building, read our guide on how to lube switches for that step. And if you'd prefer a pre-built, see our guide on how to choose a mechanical keyboard.
Frequently Asked Questions
Prefer to buy pre-built first?
A pre-built keyboard is a great way to experience the typing feel before committing to a full custom build. Browse our top picks.
See our top pre-built keyboard picks